

How to Take Pictures of Your Key
In many cases, we need to have clear photos of your key before we can make copies. Here is a guide to show you how best to take photos of keys.
Here is the long and the short of it. Lower down, you can also find some more specific instructions for certain types of key.
- Make sure your photo is clear and not blurry
- Your key should be laying on a flat surface
- We need photos of both sides of your key
- Make sure the whole of the key is visible in the photo
Click the links below to get more info on each type of key.
Flat, Yale-style keys
When taking photos of flat, standard keys, it’s important to lay the key onto a flat surface, as shown below.
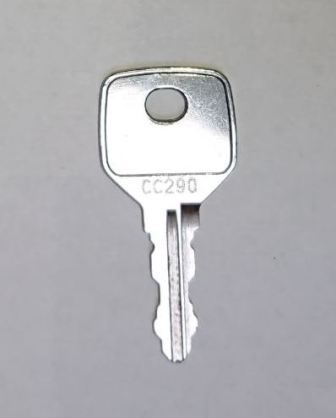
Side 1
The key is lying flat on the surface, and the photo has been taken from directly above.

Side 2
ABUS Plus and X-Plus keys
In order to decode ABUS Plus and ABUS X-Plus keys, we need photos of the key when it’s lying flat, and of the key at 90° to the surface, as shown below.
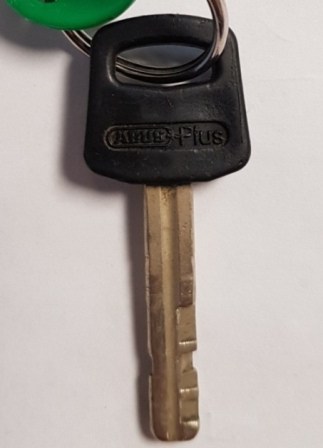
Side 1
The key is lying flat on one side.

Side 2
In this photo, the key is resting on its thinnest edge, so the edge of the cuts is visible.
Mortice keys
When taking pictures of mortice keys, it’s important that the blade is parallel to the surface below, not hanging down a little.
To get it parallel, it’s sometimes helpful to put a coin underneath the blade, to raise it slightly. The photos below show what we’re looking for.
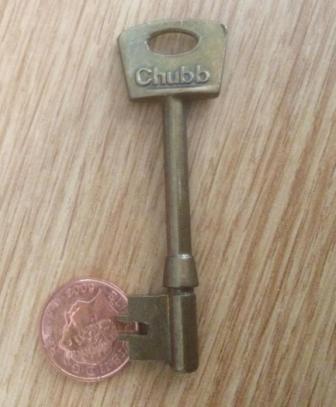
Photo from above, with coin
Putting a small coin underneath the blade of the key ensures that the key is resting nice and level.

Without a coin, the key hangs down
Here you can see that the blade is hanging down if you don’t support it with a coin or something similar.

A coin fixes the issue
Here you can see that the coin underneath the blade has prevented the key from hanging down to one side.
AVA keys
For Chubb AVA keys, we need clear photos of both sides of the key.
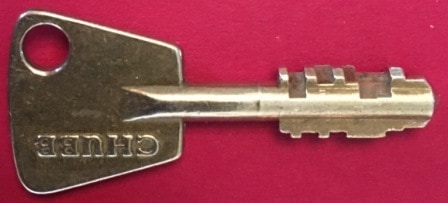
Side 1
The key is resting flat on the surface, and the photo has been taken from directly above.

Side 2
Tubular keys
Of all keys, tubular keys (also known as radial pin keys) are the hardest to take photos of. We usually need three photos at least, to show all cuts around the edge of the key. Lay the key flat on one side and take a photo. Then flip the key onto the other side, and take another.
Then, the final photo: prop the key up so that the pin on the tip of the key is pointing down. Then take a photo.
Some sample photos are below.

Side 1
The key is resting flat on one side.

Side 2
The key has been flipped onto the other side.

Side 3
In this photo, the pin on the nose of the key is pointing downwards.
Dimple keys
For dimple keys, the best thing is to take a photo from directly overhead, and another from a slight angle, as shown below.

Dimple key from directly above
One photo needs to be taken from directly above the key.

Dimple key from the side
We need one photo of the key taken from a slight angle.